How-to guide
Everything you need to go from “I own a domain” to working redirects, bio pages, and hosted DNS — with screenshots from the real dashboard.
Part 1 · The redirect app
This is the dashboard — your redirects, their live click counts, and every action (edit, clone, stats, QR codes) one click away.
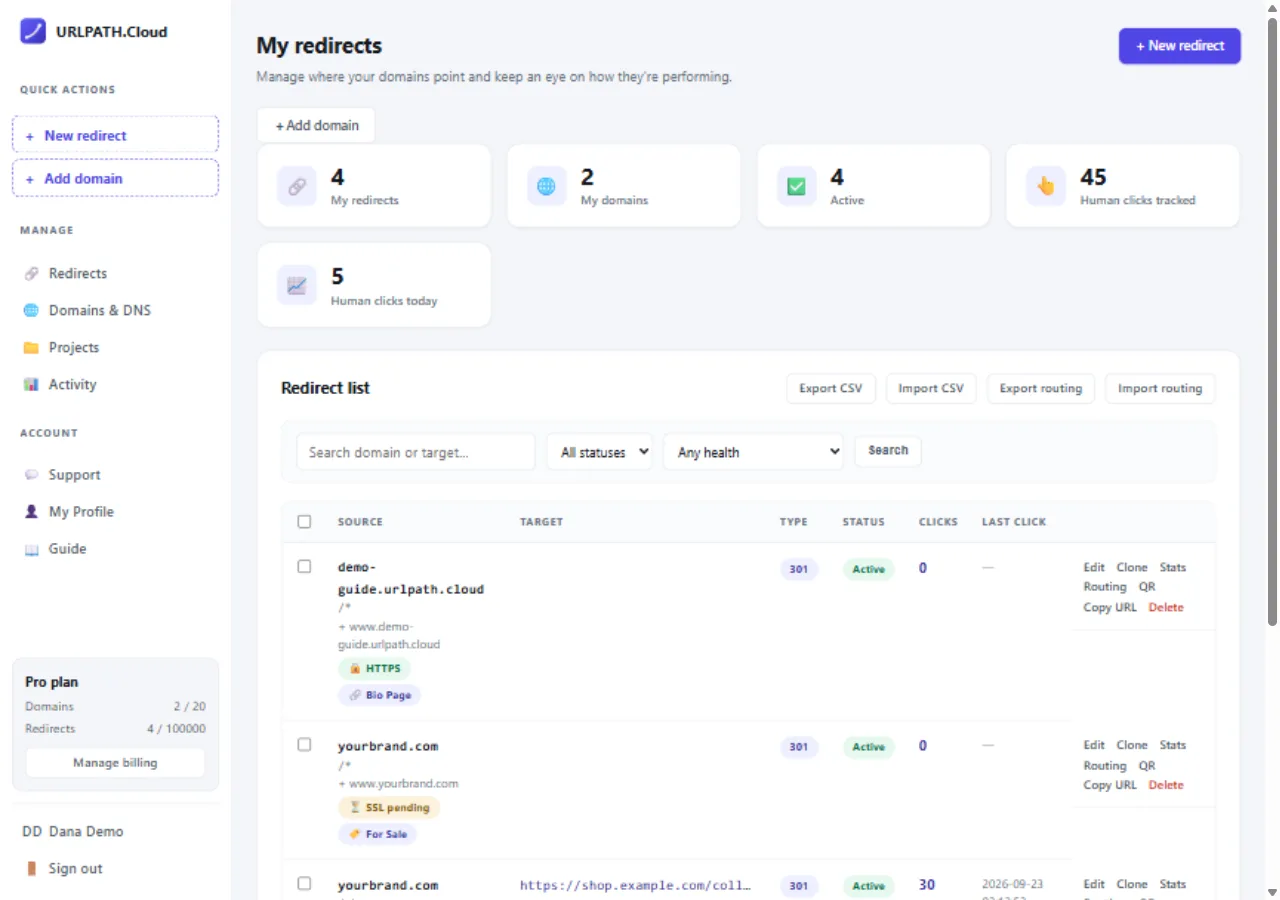
Add your domain
Sign in and open Domains. Type the domain you want to forward — for example go.yourbrand.com or a whole domain you own — choose a hosting location, and click Add domain. The domain joins your list, ready for redirects.
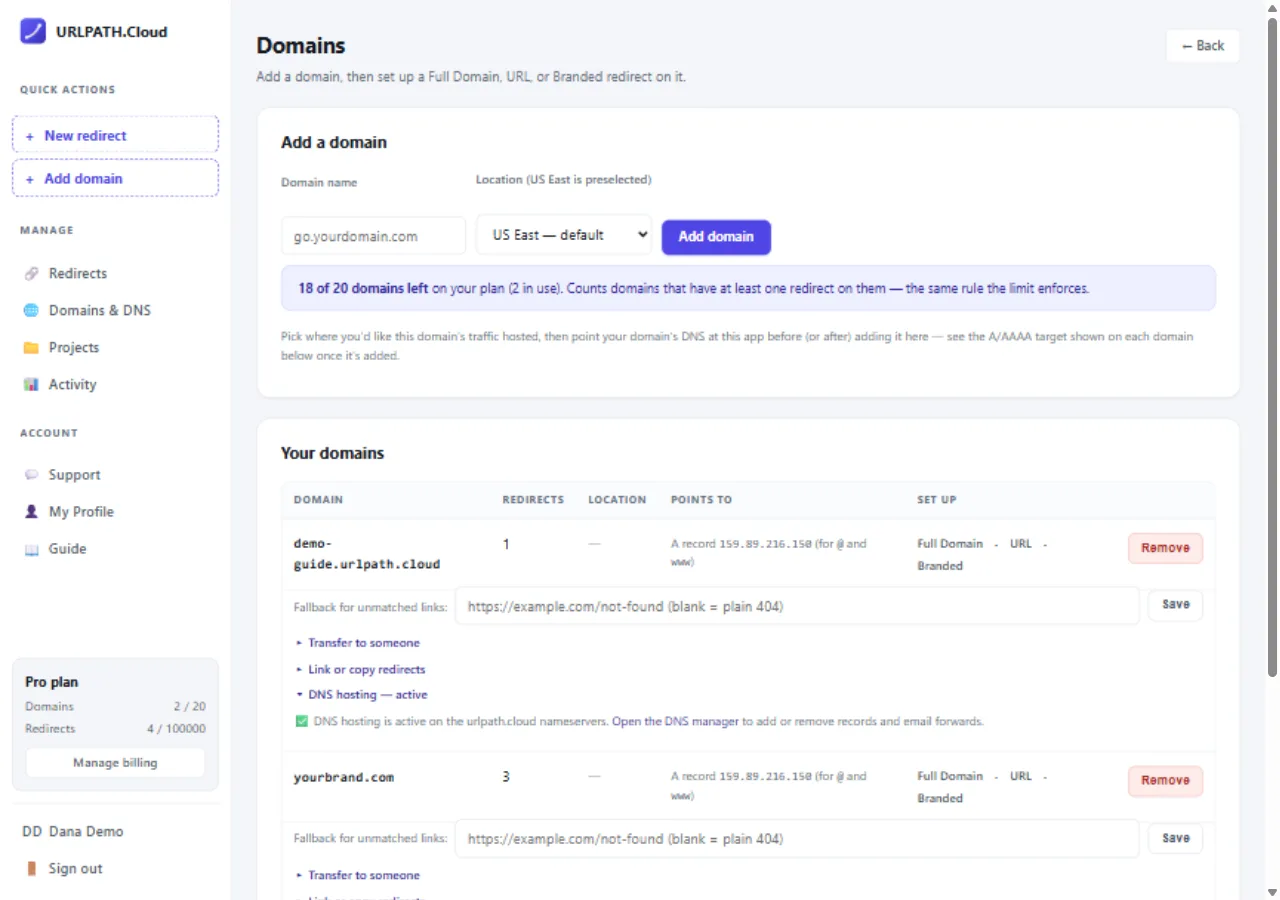
Point the domain at URLPATH.Cloud
Each domain row shows the exact Points to records. At your registrar or DNS host, create an A record (and, if you support IPv6, an AAAA record) for @ and www using those addresses. The dashboard checks your DNS automatically and lights up once it matches — then SSL is issued for the domain on its own.
Create your first redirect
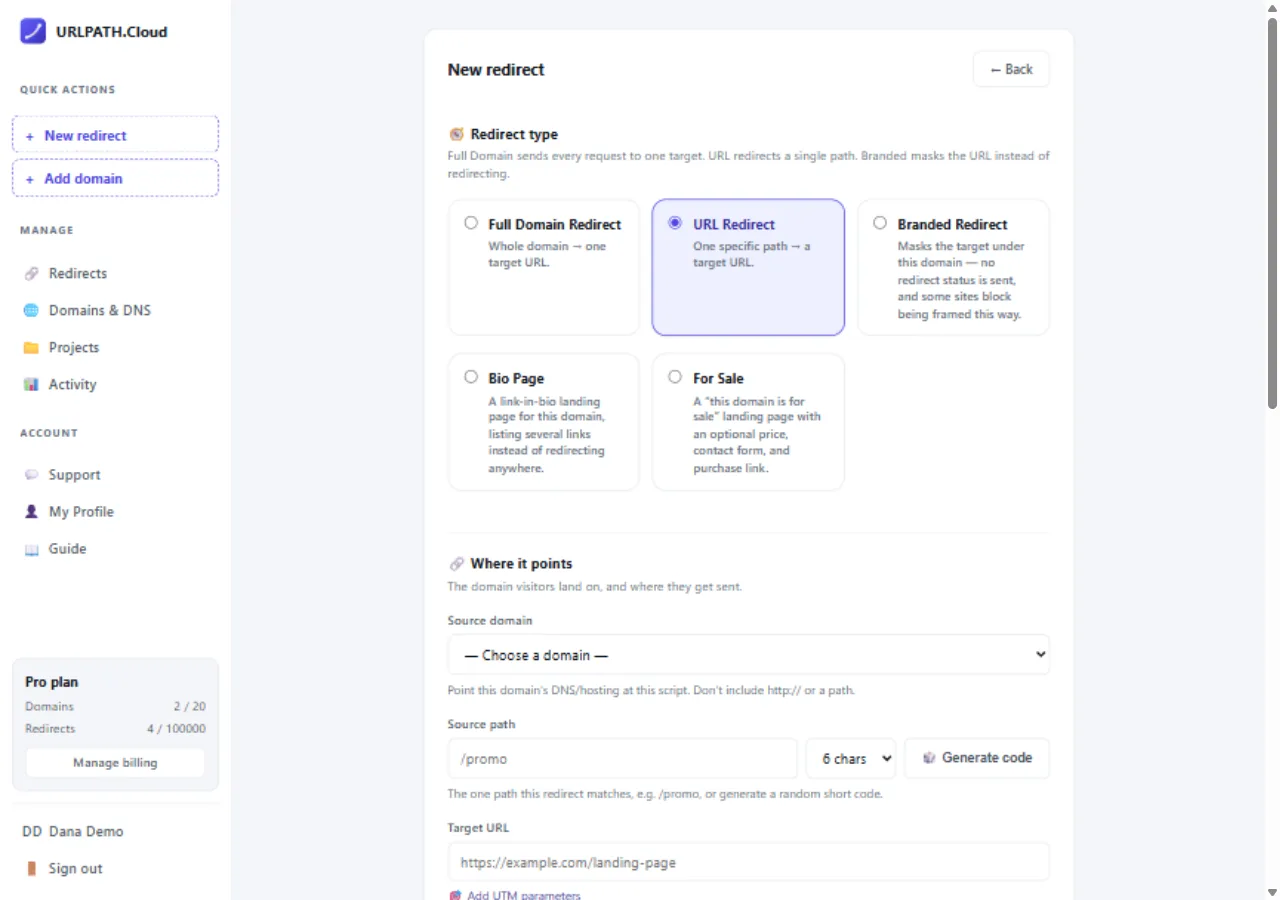
Click + New redirect and pick a type:
- Full Domain Redirect — every request to the domain goes to one target URL, paths included.
- URL Redirect — one specific path (like /promo) goes to a target. Short links live here.
- Branded Redirect — shows the target page under your domain without redirecting.
- Bio Page — a link-in-bio landing page instead of a redirect.
- For Sale — a “this domain is for sale” page with an inquiry form.
Choose the source domain, set the path (or generate a random short code), enter the target URL, pick 301 (permanent) or 302 (temporary), and save.
Build a Bio Page (or a For Sale page)
For a Bio Page redirect, the editor lets you set the page title, theme color, avatar, short bio, and a list of link buttons — each with an icon you can pick from the emoji dropdown or set custom. For Sale pages work the same way: add your asking price and an inquiry form email, and offers land in your inbox. Both page types have their own SEO title, description, and social image fields in the editor.
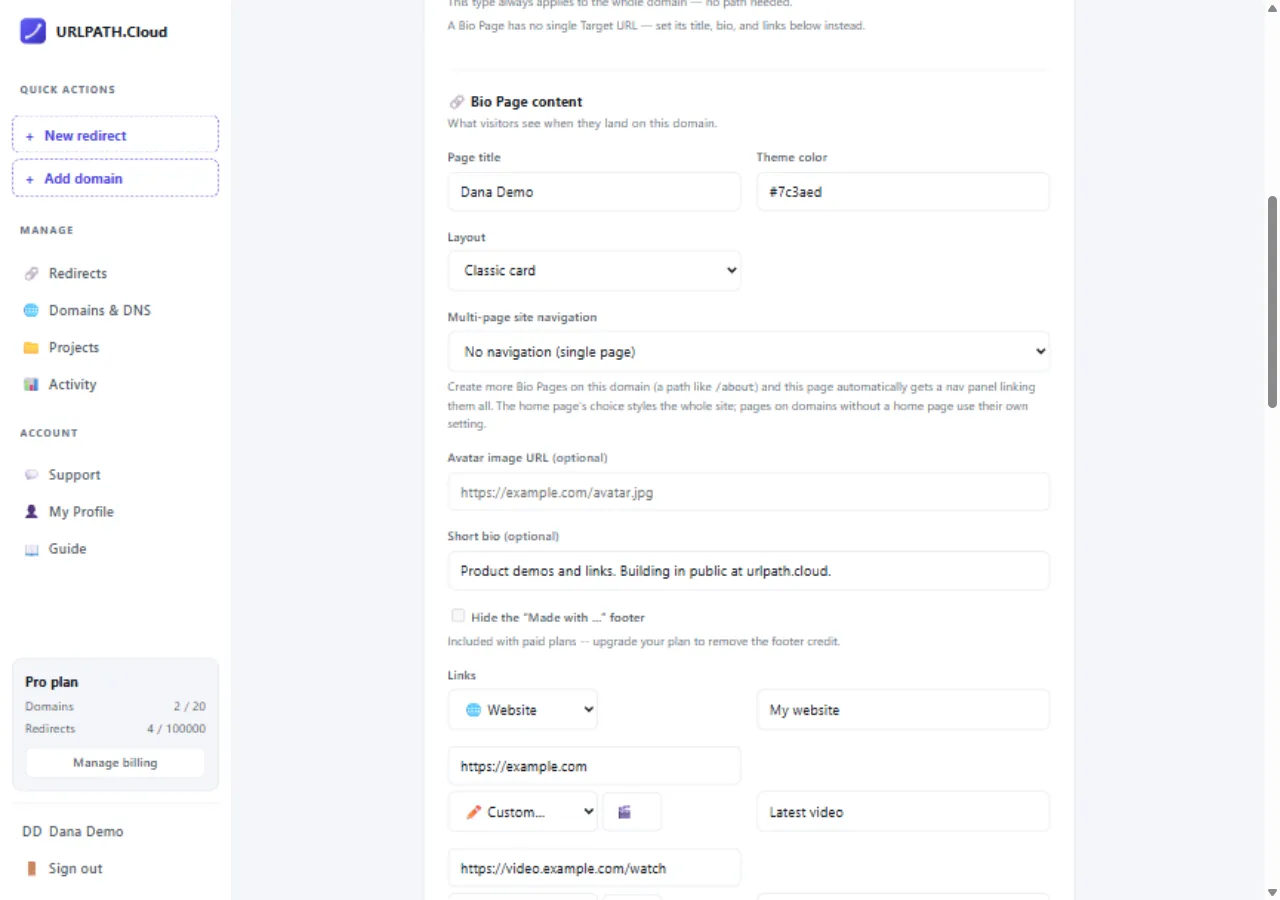
And that's just the starting point: bio pages are fully customizable — page backgrounds and gradients, fonts and button styles, a social icon row, link thumbnails with subtext and badges, section headers, video and music embeds, automatic dark mode, a banner image, a "save contact" button, and an optional visitor subscribe form. See Customizing your bio page for the full tour.
Watch performance
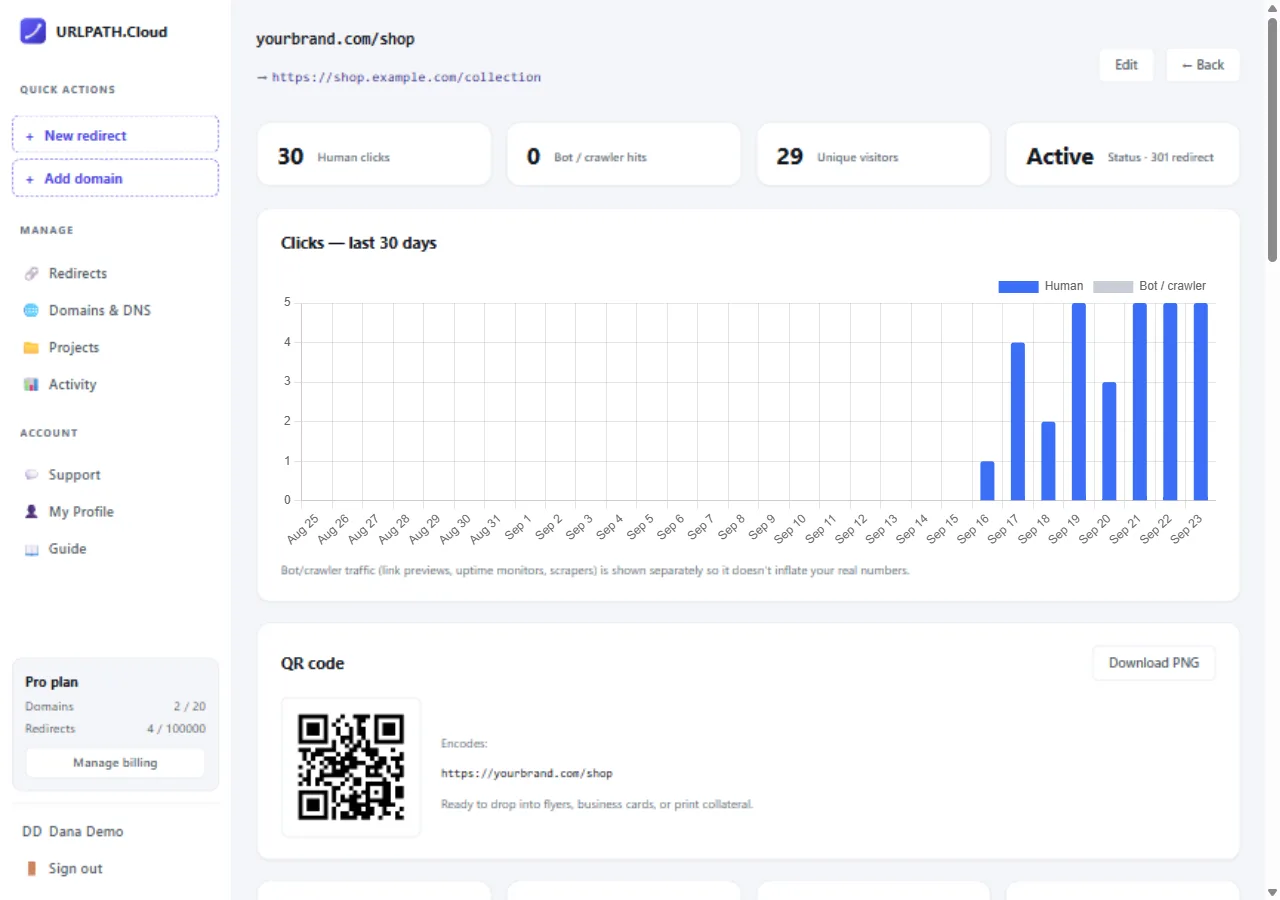
The dashboard counts clicks per redirect; open Stats on any row for the full picture: daily clicks for the last 30 days with bot/crawler traffic separated, device, operating system, browser and country breakdowns, and a downloadable QR code for print. Export everything to CSV from the dashboard, or pull it from the REST API.
Part 2 · DNS hosting & email forwarding
Enable DNS hosting on a domain
On the Domains page, open the DNS hosting section on any domain and click Enable DNS hosting. A DNS zone is created for the domain and its required records are seeded automatically. DNS hosting needs a DNS Hosting plan — see pricing for the Starter, Pro, and Agency tiers.
Switch your nameservers
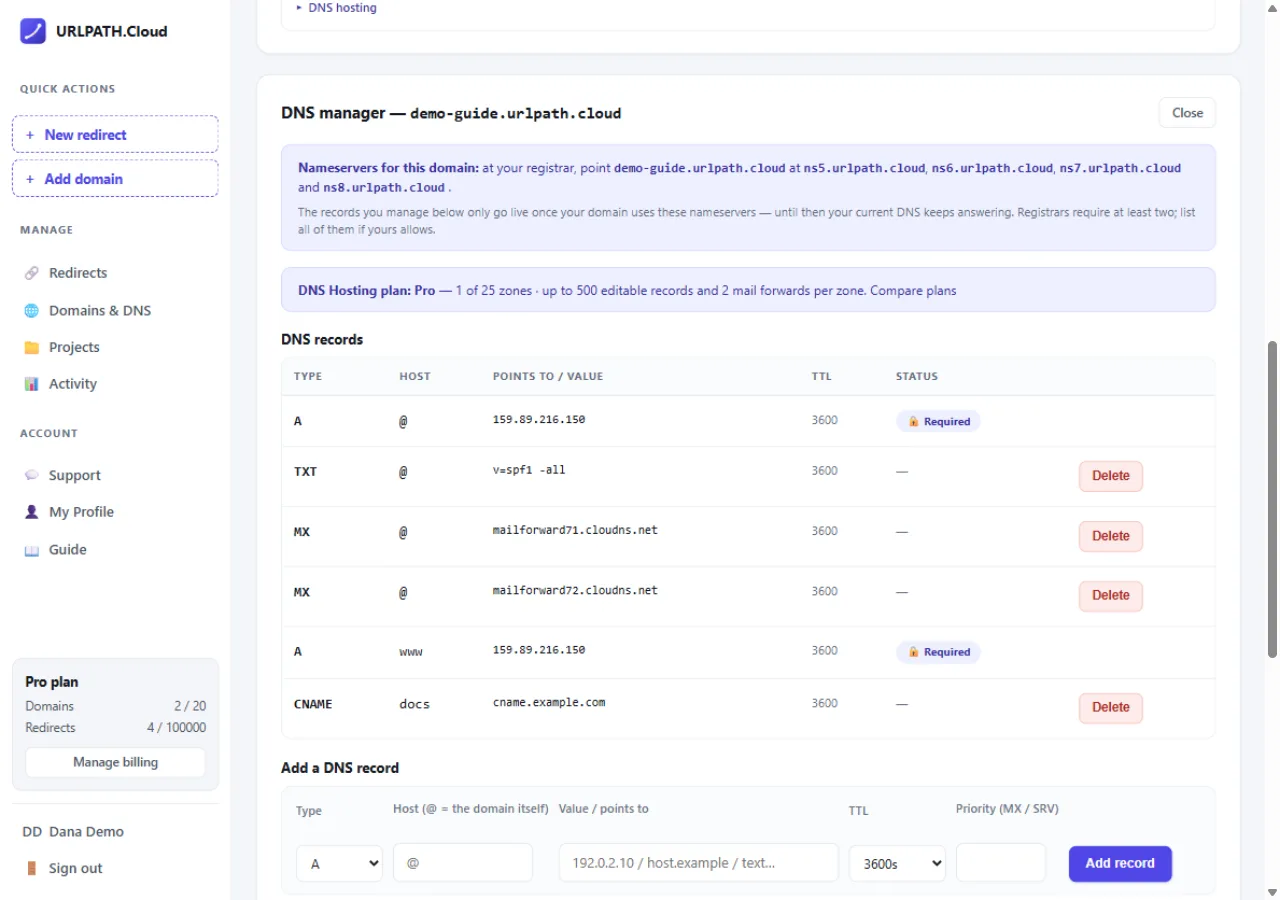
Open the DNS manager. At the top it lists the nameservers to set for this domain at your registrar — currently the anycast set ns5.urlpath.cloud … ns8.urlpath.cloud (your branded nameservers). Once your domain uses these nameservers, the zone you manage here is what the world sees. Until then your current DNS keeps answering, so nothing breaks while you switch.
Add and remove DNS records
The records table shows everything in your zone. Records marked Required (the A/AAAA records your redirect service needs) are managed by us and can't be deleted; everything else is yours. Add records of type A, AAAA, CNAME, MX, TXT, CAA or SRV with a TTL you pick — changes apply on our nameservers within minutes.
Forward email — including a catch-all
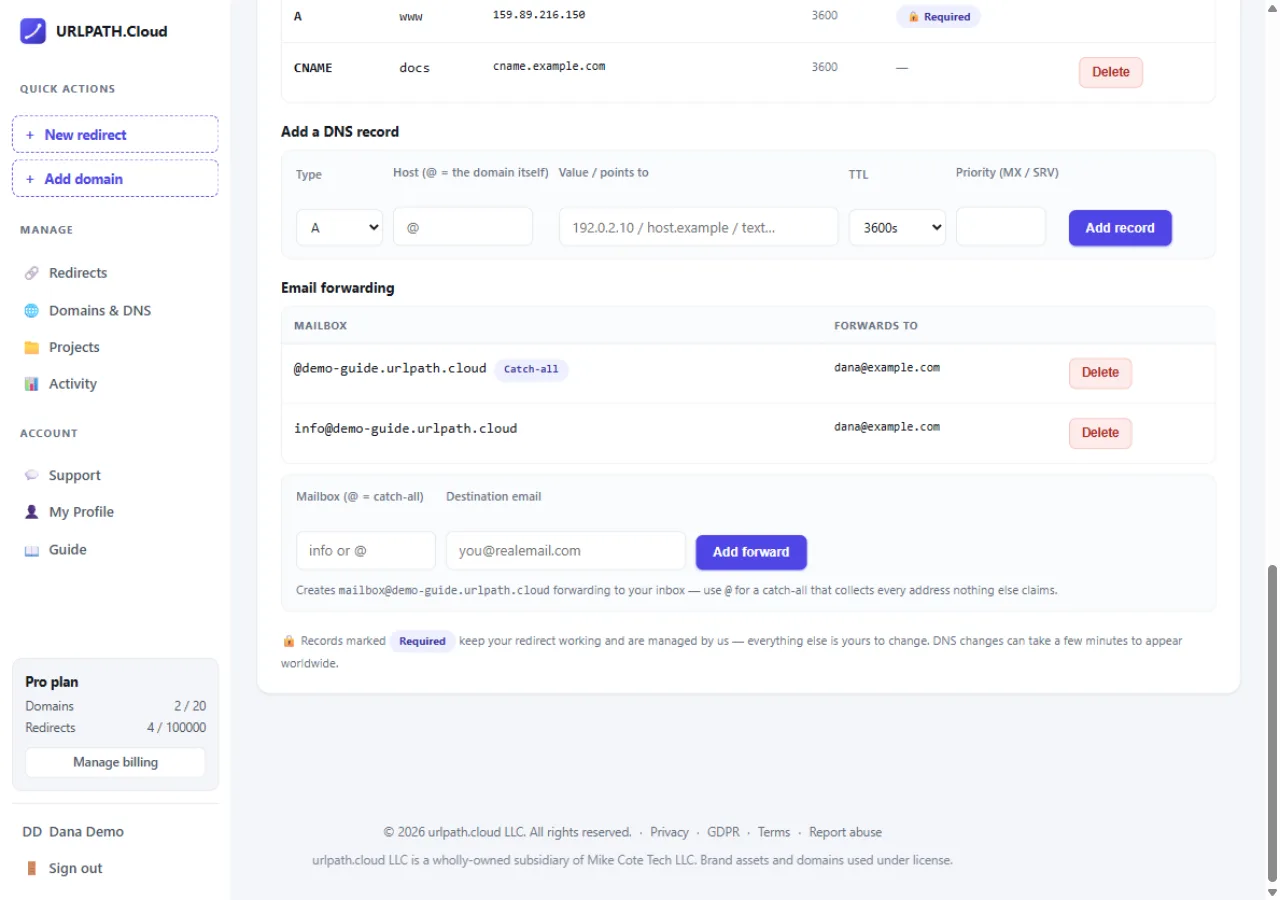
In the Email forwarding section, forward any mailbox on the domain to a real inbox — info@yourbrand.com to your personal email, for example. Use @ as the mailbox for a catch-all that collects every address nothing else claims. If the zone has no MX records yet, the ones email forwarding needs are created for you.
Know your limits
Each DNS Hosting tier sets how many zones you can host and how many records and forwards each zone may hold. The DNS manager shows your plan and current usage at the top, so you always know where you stand. Need more? Upgrade on the pricing page.
Part 3 · Team accounts
Open Account & team
Everything you add belongs to an account -- a personal one was created for you at signup, so if you work alone, you're done. Working with others? Open Account & team in the sidebar. It holds the account's business details (name, contact email, phone, mailing address -- editable by the owner), the member list, and the invite form.
Invite your team
Enter a teammate's email and pick a role: owner (everything, including account details), admin (management plus invites), member (domains, redirects, DNS), or viewer (read-only). They get an email with an accept link -- existing users accept while signed in; new people register with the invited address first. The last owner of an account can never be demoted or removed, so ownership always has a home.
Switch between accounts
Linked to more than one account -- yours plus a client's, say? The sidebar shows a "Working in" switcher. The Domains page, the redirect editor, and every new add all land in the account you're currently working in, and plan limits are counted per account. Switch any time; nothing moves.
Stuck on any step? Contact us — or check the FAQ for quick answers. More step-by-step articles live in Support.